Showing posts with label slasher house. Show all posts

Tuesday, 17 May 2016

THE WAPAH!! CHECK LIST : 5 Ways to Check Your Location Has EVERYTHING You Need.


So you've found the perfect place to shoot. It has the right aesthetic for your films tone and its functionality matches your script perfectly, but there are some things that you'll want to bear in mind before you start booking your cast and crew.

Once you've found your location, we talked about some ways to do that HERE, you'll need to make sure that it suits your needs and that its a viable venue to set your movie. Not all locations are created equal and there are 5 things that you need to look at to make sure that where you want to shoot works for you. 

I created something called 'THE WAPAH!! CHECK LIST', which are 5 things that you should look at when you are scouting for places to ideally shoot your next film.

WATER
One of the first things I do is check that there is running water on location. Especially if you are going to spend any length of time there. It seems like something that wouldn't be that important, but if you don't have access to running water, trust me, you notice fast. This could just be a bathroom or kitchen and if you are shooting in a standard suburban house or commercial facility then, chances are, that they'll be water for bathrooms/washing/cleaning up/doing hair and makeup/special effects etc. 
Legacy of Thorn (2014)

However when you're out shooting in warehouses, old buildings and abandoned places (as well as out in nature) Water starts to become harder to come by. This is where you need to figure out how much water you need to bring yourself,  for people and for functionality. Drinking water should always be brought anyway (don't EVER let your cast and crew drink from taps in abandoned or old buildings), but you should be aware of how much you need and what you need it for. 

On Slasher House and Legacy of Thorn, we shot in old, non functioning government buildings. They had electricity and some running water (only cold), but there was no water flow to the showers in either case. This was a problem when most people returned from shooting each evening covered in dirt and sticky blood. Obviously before we got there we had to figure out a solution to that. Which brings us to...

AMENITIES  
Based on how much access and the type of access we have to water and facilities, I then look at the local amenities to figure out just how far we'll have to travel to do things like shower/use the bathroom/get refreshments. This should, again, give you a good idea of what you need to bring in terms of equipment, food, water and what you can have access to on the day. What shops are available locally? How far is it to get to them?

The distance between your set and your amenities can make a huge difference. If you're working with a small crew and suddenly someone you NEED has to take a 90 minute round trip to pick up food or take an actor to the bathroom or what have you then you are gonna see a lot of downtime when you're not shooting and this is when thing start to overrun and cause problems. Also, if you've every met an actor who can't shower for a couple of days, then you'll understand how important it is to find somewhere for them to wash regularly. 

On Legacy of Thorn, the school we shot in (and lived in) for 14 days, had electricity and running cold water, but then water only ran in the admin building and not to the showers down in the sports block. We bought solar showers as it was the height of summer, but they were less than successful, luckily we had scoped out the leisure centre before hand, about 20 minutes down the road and told them what we were up to, they agreed to let us use their showers and we scheduled in time in the day for actors (and then crew) to go and get washed if they needed. 

POWER
Obviously if you are shooting a movie, you are probably gonna need power. Although not in all instances, which is why its actually 3rd on the list (that and it helps me spell WAPAH by being here). After checking our water supply and amenities I look to see how much power (if any we have). How many power points are there? Are the functional? Are they wired safely? How many extensions will we need to set up how many lights? This way I can plan exactly what I need to pack in terms of power/lights and if we need a generator or not.

If we're shooting outdoors, we use rechargeable led lights and scout with that in mind to try and find places with decent natural light already, If we're shooting in the day, this becomes less of an issue obviously and its entirely possible to shoot with natural light and some reflectors. If you're shooting in doors at night you'll probably need power. This is also useful for things like recharging gear, batteries, running footage off the camera and making cups of tea (The most important use of power on a British set). 

On Slasher House 2, we needed to shoot in a graveyard, but getting power out there was a problem that we found impossible to solve. To try and regain control over lighting, we asked a lovely friend of ours who had helped us out on a previous film, if we could use there expansive garden to build a graveyard and run power from the house. The only problem is that they only had one outlet we could run power from, we thought it would be enough at a push and very quickly we started to find that we would lose power to the 3000 watts worth of lights we were running. This meant having to pause filming every 20 minutes of so in the pitch black on a -1 December evening. Make sure you have enough outlets to run your equipment properly.


ADVERTISMENT
ACCESS
What kind of access you have to your location is important and it will ultimately determine if the location is right for your shoot. Can you only get in to the location at certain times? Can you access it around the clock? Is it a 6 hour drive away from base camp? Is it near any civilisation at all? Can you drive to it or do you have walk on foot? There is a huge list of things that will make getting to a location a problem and you sometimes have to weight up if that location is worth using if its too difficult to get to.

You also want to be aware about how long you have at the location, if you need to work around a business then you will probably be shooting after hours, if you need nightfall then you'll have to check that you have access at night. Its worth checking if you can house your cast and crew there to. The easiest shoots i've had are the ones where we lived on set (or in the same complex) as there wasn't travel to worry about or driving back and forth from location every day. Plus it makes its easier for everyone to bond.

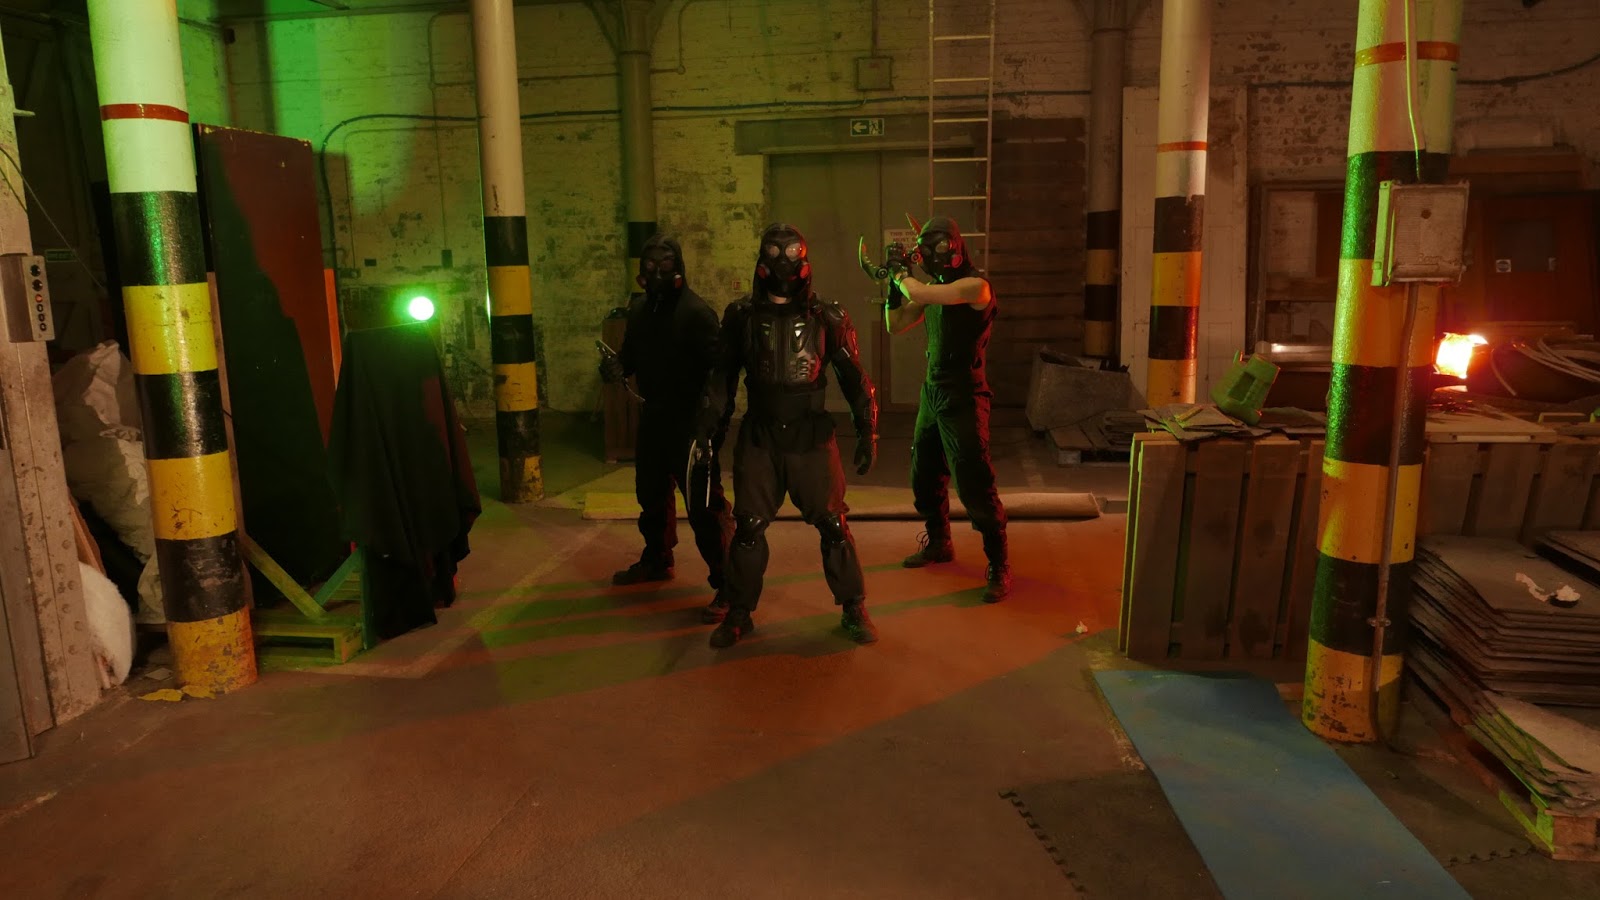
On Slasher House 2, we had our main location around the clock, which was fine as we needed to shoot at night because of the locations huge factory windows, we just couldn't cover them. This was fine as we could get in anytime we wanted, The only stipulation was that if we didn't leave by 10 when the gates closed, then we had to stay until 5 in the morning when the gates opened. This led to either having to rush through what we were doing as soon as it got dark, or finishing in the small hours in the cold and then having wait to leave. It took us a while to try and swing the right balance, so its important to try and factor these things early on if you can.

HEALTH AND SAFETY
After I've checked all the above, I then do a huge sweeping check that I consider the MOST IMPORTANT one of all. Health and Safety. This really goes to looking at most of the previous things over all, Is the power safe? Is there enough water to clean wounds? (Real ones rather than sfx) Where is the nearest hospital? The nearest first aid kit? and then I look at what has to happen in the scenes and looks at where our actors will be and how to keep them out of as much danger as possible. Looking for things like loose flooring, nails, low hanging roofs, doors, wires anything that I think might be a hazard and just look at what I need to stay away from and what I can clean up or make safe again. 

Its most important of all to keep you cast and crew safe. If they are going to be crawling around of the floor then I'll make sure its swept and that any sharp objects are removed and just generally try and make it as comfortable as possible without ruining the aesthetic. If there are any stunts, I look at how we are going to do them safely and securely and wether we'll need mats or not. A lot of it is really just common sense, like "don't touch that live wire", "Don't hold that 1000 watt light with your hands" or "don't kick this pile of asbestos boards thinking they are plaster" (That one was me on my first shoot). 

Also and this is a BIG ONE : Make sure you have Insurance, even if you are just making a little no budget movie, make sure that have insurance that covers you in case of any accidents to your actors and the public, you'll save yourself a load of problems should the worst happen. In all honesty there have been very few accidents on our sets, Thats probably down to a mixture of luck and planning, things do just happen, especially when people are in the heat of the moment during a performance and all you can do is do your best to try and account for what could go wrong. Just be careful and ask your actors and crew to do the same, but try and stay safe.


___________________________________________________________________


MJ

IF YOU FIND THIS BLOG USEFUL. PLEASE SHARE. You can keep up to date with our filming goings on at our FACEBOOK PAGE :)

 Get Legacy of Thorn on DVD and Digital HD now.
ADVERTISMENT


Tuesday, 10 May 2016

FINDING LOCATIONS : 3 Easy Ways to Find Your Next Film Set


As we've talked about before, finding the right location can make or break your movie. Shooting your film in the right place adds so much production in terms of style, look and value that to over look it is setting yourself off on the wrong foot.

In big budget movies, it not uncommon for sets to be built on a sound stage wherever possible, this is usually due to the amount of control the creative team needs over the set, i.e being able to remove walls, lighting, shooting around the clock. If you're shooting on a budget its unlikely (although not impossible) that you can build your 'Church Interior' or 'Canadian wilderness' from scratch as a set on a sound stage. This usually means that you have to find something the preexists in the world.

This is both a blessing and a curse. Finding a pre-existing location means that you have less control over things like weather, power, access, angles, food establishments and the list varies drastically from place to place, meaning a lot of prep and compromise most of the time. The upside however, is that you get something real, something that you can't build, something raw and lived in and that is really what adds the value to your films.

FINDING YOUR LOCATION

Following are 3 ways of sourcing locations when you are working on a limited budget, These 'suggestions' are by no means the best , or the only, ways of finding the right location for your film, but hopefully they'll help you think creatively about what you need and help you look at where you shoot in more productive way.

1. UNIQUE CIRCUMSTANCES

Douglas Prison : Isle of Man
Finding locations can be tough going. Especially if you need anything outside of student flat or family home, things start getting difficult pretty quickly. This is when you need to employ some of your unique circumstances to finding what you need. By 'Unique Circumstances' I mean this, Everyone has access to something unique that no body else has access to, in terms of locations.

This is basically looking at what you have access to personally. Can you make a film out that creepy looking shack your dad built at the bottom on the garden? Does your Aunt work at a High School after hours? Does your mate have the keys to the warehouse on a weekend? All these are great starting points to finding a great location to shoot in that isn't 'Mark's Studio Apartment' and also a brilliant way of getting the creative juices flowing. There a few things than coming up with a  scene or even an entire film based around an amazing location. 

I always 'try' to write locations based on something I know we have or can get access too, even if that means taking a pause from writing for a moment and throwing it out there to people I know with a "Does anyone have access to..." and usually I receive a "No, But I have access to...", sometimes this will dictate where the film is set and sometimes the direction a film will go.  You have to be creative and compromise when it comes to low budget filmmaking. 

Slasher House (2012) Douglas Prison : Isle of Man 

For Example, I originally wrote Slasher House to take place in an old run down mansion, when we were offered an abandoned prison, it was too good to pass up and we adapted and it worked out for the better, both visually and thematically. It also meant we had to adapt one scene to be set in a 'Gallows' which was a pretty awesome, if not terrifying, experience and also added another dimension to the film.

ADVERTISMENT
2. YOUR NETWORK

After you've spent your first couple of movies exhausting and exhausted your family and friends locations, you should have begun to develop a 'network' of people to work with, to show your work to and who also make movies. This is your community and these are the people you can turn to for help. 

Other filmmakers are a great conduit for resources, this is because, just like you, they spend their time making movies and, believe or not, have come up against most the same problems you have when it comes to getting locations and come out the other side. Its a great way to to find creative solutions to problems, by talking to people who have already solved those problems and getting their advice.

The biggest advantage of this, is that it gives you a new perspective and helps you think outside the box. One of the biggest mistakes I see people making in terms of locations is that they need something so they look for "INSERT LOCATION HERE" and that alone, when one of the key ways to solve the problem is finding something that can do the same job, but provides earlier access. Other filmmakers will have been through this and will be able to help advise you and what can substitute your needed set. 

Legacy of Thorn (2014) : High School Oldham : Main Building
Legacy of Thorn (2014) : High School Oldham : DT BLOCK
What I mean is, for example, on Legacy of Thorn we needed a hospital, but getting one that looked operational was tougher than we could have imagined. Instead we found a section of our old college that looked very similar to a hospital corridor (along with first aid room) and dressed it up to stand in for it. Throwing in some posters, a couple of extras in long white coats and nurses uniforms and we had a what we wanted but without the red tape of shooting a real hospital. 

Sometimes its worth talking to other filmmakers about how they made it appear that they shot in a location.

3.  JUST ASK

Possibly the simplest approach to finding the right location is to find the location you are after and just ask. It seems like there might be more to it, but its really as easy as that. Sometimes if we need a specific location we just find the place we want and then ask. Sometimes we're successful and sometimes not, but no one has ever done anything worse than say 'No'. Usually people just want you to cover electric or a small charge to use it, sometimes they might even just let you have it for free as long as it doesn't conflict with business hours etc.

The real issue with this approach is that it can become a numbers game and thats a lot of ground work, but if you're willing to put that work in, you'll almost certainly find the location that you're after. Just find the type of location you're looking for and make a list of suitable candidates, from here your kind of politely cold calling and explaining your project and what you want to do. Some people won't care, some will be interested, but won't be able to help you and you'll come across those who will do whatever they can to accommodate what you're doing. Its pretty much that simple.

Slasher House 2 (2016) Warehouse 
Slasher House 2 (2016) : Warehouse
For Slasher House 2, we needed a government facility (or something that could pass for one). We actually live in the town that has the government facility that solved the Enigma Code (now a tourist attraction), but they were a flat out 'NO' out of the gate. We decided that we would have to found something that could work instead of and figured a 'Lazer Quest' could work. We emailed every Lazer Quest in a 100 miles radius and out of 25 we got a response from 2, we met with one. It didn't work out due to the times we needed, but we had the location should we want it. 

We eventually went in a different direction that worked out better for us, but I'll talk about that in a future blog. 


___________________________________________________________________

I should point out, that its important to be honest and up front here, telling them you're shooting a family drama when really you're shooting a gore soaked torture porn is counter productive when you turn up on the day and start spraying the place down with food colouring and syrup and if they think they've been fooled, chances of them signing a release form are slim and even if they do and then find out they've been lied to they'll just flat out refuse the next filmmaker that come knocking and its your job to make sure that we pave the way for everybody in the community.

Just like any aspect of filmmaking, employing creative thinking is your friend and if you think about what you need in front of the camera creatively you might even surprise yourself in what you come up with what you think of outside the box or sometimes its as simple as just asking. 

MJ

IF YOU FIND THIS BLOG USEFUL. PLEASE SHARE. You can keep up to date with our filming goings on at our FACEBOOK PAGE :)

 Get Legacy of Thorn on DVD and Digital HD now.
ADVERTISMENT


Monday, 21 March 2016

LOW BUDGET LENSES : THE ONLY 2 LENSES YOU REALLY NEED


A couple of weeks ago I wrote a blog about a set of low budget Primes for under £50($70), of course they were only suited to mirror-less cameras (You can find it HERE), which came as a bit of a disappointment to those low budget filmmakers still shooting on DSLR's, which are great option for those who can't splash out on something more expensive, but lack some of the cheaper lens options available for MFT (Micro Four Thirds) cameras. A lot of people asked me about options for their Canon EF mount cameras and what options were available to them. 

Since 2010 I have shot on Canon entry level DSLR's, I only recently moved over to using Panasonic in fact.  Over 6 years I shot 4 features between a 550d(T2i) and a 600d(T3i) as well as over 35 music videos and promos that aired on TV in the UK and US, so I know just how much a viable tool these cheap cameras can be. But when it came to budget lenses, there are very few cheaper options available. However that doesn't mean that there are none. 

In the 6 years I've been using the cameras I have had a grand total of '3' lenses and the truth is that I only ever really used 2 of them and the good news is, the two I use are the cheapest lenses available. I shoot narrative films and music videos mainly and so the lenses I use are suited to that and, of course, depending on what you're shooting will determine the lenses that you shoot on, but up until November 2015 I shot using just these two pieces of cheap glass. 

Canon Kit Lens 18-55mm f/3.5 - f/5.6


If you're buying your first Canon DSLR, you most certainly will pick it up with what is known as a 'Kit lens' (a lens that comes packaged with the camera). The Canon standard kit lens is pretty well known for being a decent 'all purpose' piece of glass that covers most bases for the average no budget filmmaker.

It has a decent focal range of 18mm - 55mm that means you can get both wide angles and those tighter shots with nice depth of field. Where this lens really falls down is in low light. It works great if your shooting in bright, sunlight spaces and at it widest it opens up to f/3.5 which is decent enough for most low(ish) light scenarios. But anything closer in anything other than great light is going to mean that you need something a little bit faster to get a good clean image. The lens however is great for things like crane shots, steady cam rigs and dolly moves.


Hollower (2016) Canon 18-55mm f/3.5 (Kit Lens)
One thing I did was pick up a wide angle adapter lens, just to open it up a little more for steady-cam shots etc. It cost me around £15 on ebay and its saved my ass more than a few times when the location just hasn't been open enough and saved me dropping a small fortune on wider lenses. The adapter also screws in half to become a macro lens fort shooting extreme close ups, which came in extremely handy in getting those close up eye shots that I love so much.


ADVERTISMENT

CANON 50mm f/1.8 (The Nifty Fifty)


The cheapest Canon lens outside of picking up the kit lens is the Canon 50mm f.1.8. Its known in the photography and filmmaking community ads the 'Nifty Fifty' and it is definitely the most bang for your buck when it comes to lenses. I picked this up for a steal of £90 back in 2010, for Slasher House, but since then they can be found on ebay for as little as £50 (not to mention cheaper clones etc).

Being a faster lens, and a prime, the image quality that comes out this lens is amazing and it really goes that shallow depth of field that a lot of filmmakers look for in their image. Along with that, you can shoot in some very dimly lit spaces and still get an amazingly usable image.  Mix that with the fact its the cheapest lens available in Canon's range and you're onto a winner. If I shoot outdoors in available light at night (I do fairly often) then this is my go to lens for sure.


Cleaver : Killer Clown (2015) : Canon 50mm f/1.8
This is my work horse lens, meaning that for 5 years, I used it as much as I could and found unless it was a wide angle shot, or I was in an extremely small space, this lens did everything I needed of it and it performs amazingly in low light. I used this lens mainly for mids and close ups and its gives some stunning results. It is easily my favourite Canon lens and well worth the small price. If you're shooting on Canon SLRs this the lens to you want to have in your collection.


TELEPHOTO LENSES?

I considered adding a telephoto lens to the article, but in the end I decided not to. I was given a Canon 70 - 300mm f/4 a few years ago (someone had a spare) and over the course of 4 features I have used the lens 4 times and in all honesty I probably didn't need to (although it was helpful to have it), but really, in modern narrative filmmaking, unless you're shooting westerns, sports or car chases, you aren't gonna crack out that telephoto lens all too often.

In reality its probably better just to drop £10 or so on a Telephoto adapter lens if your using it for a shot every now and then, that way your saving your self a few hundred bucks for something that you'll use infrequently unless your shooting sports stuff.


______________________________________________________________

There are certainly much better and more expensive lenses out there, but if you're looking for something that gives you bang for your buck without changing up your gear or switching to another camera then these are brilliant options and I know literally dozens of filmmakers who have got by for years using this exact same set up and we've shot dozens of commercially released work on these lenses.

Just remember that what you shoot on is not a substitute for talent or skill and no lens is going to make you a better cinematographer or filmmaker the same way that no lens will make you a worse one. 

MJ

IF YOU FIND THIS BLOG USEFUL. PLEASE SHARE. You can keep up to date with our filming goings on at our FACEBOOK PAGE :)


 Get Legacy of Thorn on DVD and Digital HD now.
ADVERTISMENT

Monday, 7 March 2016

LOW BUDGET LENSES : 3 PRIME LENSES FOR UNDER £50

When choosing Lenses a lot of it comes down to personal taste. For me, I'm shooting narrative film or music videos, mostly in dark/enclosed environments and so for me these things are important factors when looking for glass to put on my camera. 

The biggest problem I faced when I first started buying lenses for my Canon t2i 6 years ago was that after I picked up the very affordable Canon 50mm f1.8 for £100 (You can now get clones for around £50 on ebay) the list of affordable lenses ended. As a low budget filmmaker, finding cheap glass for the camera was tough going. Luckily the kit lens and the 50mm are more than enough to cover most narrative situations with the 'Nifty Fifty' acting as my work horse lens. I also picked up a zoom lens eventually, but in all honesty I must have used it about 4 times over the course of 5 features. The main problem I had always came when I needed wide angles at low light.

When I moved to Panasonic, after 5 years of shooting on a Canon, I was spoilt by the LX100's low light lens that was f1.7 wide open. Thats at its widest angle too, which solved a lot of those problems for me. The issues with it came with the form factor, main that it was a compact, fixed lens camera (although you wouldn't think it from the images it can produce) and as a result had a digital focus ring rather than manual. After working with manual focus for the last half decade, I found it a pain. The upside was the camera shoots 4K and so I was reluctant to move back to Canon.

Then Panasonic released the G7. The price was equivalent to upgrading to Canon's newest 'Rebel series' camera, but with the added bonus of shooting 4K and a better FHD Codec. It was a no brainer, except for the fact the camera had a Micro 4/3 mount. A mount that I hadn't used before and of course I thought back to how unaffordable Canon's lenses were for me when I started shooting on DSLR's. I didn't want to have to drop a bunch of money on getting a whole new set of glass for a new mount on top of dropping a chunk of cash on the new camera. So I started looking for a low budget solution. 

What I found was an extremely cheap and absolutely incredible set of Prime lens made by a company called Fujian (although search C-mount on Ebay for 'off brand' results) that covered almost everything I needed in terms of image and focal range and the amazing thing is I picked them ALL up for just over £50 (although they are available a lot cheaper).  I've broken them down for you all below. The prices are based on what is available this morning on Ebay.

25mm f1.4 CCTV (£12/$17) 
A solid wide angle lens, although the focal length is obviously not as extreme as Panasonic's native 14mm prime, it's wide enough for most situations. The wonderful thing about it is that it creates the most beautiful images of the 3 (which is pretty impressive as its the cheapest) and although it has soft edges at low aperture that only adds to the vintage film look that this lens puts out. 

The 25mm is my go to lens for most situations it's wide enough that it can achieve tracking, dolly and even steady-cam shots whilst giving enough depth of field to maintain that film look. The best part though is the price. I paid just £17 for mine and only because I needed it in a hurry, i've seen these tiny bad boys for as little as £10. If I had to pick just one of these lenses for a shoot, it would be this one.

Take a look HERE

35mm f1.8 CCTV (£14/$20)
This was the first lens I picked up, originally to fit it to a Canon Eos-M. When I moved to Panasonic I tried this out with a 99p adapter on my G7 and was instantly amazed at just how much better than the LUMIX kit lens it looked. It was what instantly inspired me to try the other C-mount lenses. 

It's not quite as durable under low light with it landing at only 1.8 (or 1.7 as is it says on the lens) when fully open, which you wouldn't really notice until you start using the 1.4 lenses more often, but a slight ISO shift should solve most problems in that regard. This is a great medium lens and fantastic for mid shots. I use this mainly for long conversation shots and action stuff where I want a tight image without losing the detail of what is happening in terms of movement. 

Take a look HERE

50mm f1.4 CCTV (£20/$29)
This is very similar to the Canon version in terms of the image it produces. I loved this focal length in my Canon t2i and only really bought the C-mount version to make lens changes faster on set, this is because the lens cost me £27 (once again, only because I needed it in a hurry), I have seen them for £15 at times. This is the most expensive lens out of the set and at £15/£20 that's not a lot.

The upside of trading the Canon 'nifty fifty' for this on was that I found I wasn't switching out adapters when I'm on set, I can just screw the 'Fujian' lens onto my adapter and its ready to go. There is also the fact that this 50mm is 1.4 wide open, making it just that little bit better under darker conditions. Its an incredible close up lens. 

Take a look HERE


ADVERTISMENT

I was blown away by the quality of these lenses, like really, really blown away. They can feel a little cheap sometimes, as some parts are made of plastic and they sometime feel a little fragile, although they are more than durable. They are also Manual Iris which means setting the aperture by hand, I found this tricky at first (mainly just knowing if I was getting the right exposure), but in 3 short months its become second nature and I actually prefer it to an electronic one. On top of that any kind of auto focus is also off the table, but thats something I didn't use on my Canon so its not an issue for me here.

I've been shooting a feature using these 3 lenses since December and I love them, they look so filmic and make shooting in low light conditions an absolute breeze. The 25mm is wide enough for most long shots although I do have a 14mm Lumix prime (With wide angle adapter) in case I need and extreme wide, but I use it very rarely. I can say with great ease though that moving to Micro 4/3 has been a great decision for me as a no budget filmmaker.

Obviously this is bad news for anyone not shooting Micro 4/3 as the lens aren't compatible with Canon's standard FD mount, for me this was another reason that justified my move to Panasonic's brand of cameras. Although the Canon Eos-m (On Ebay for just over £100) has a smaller mount and takes them no problem, so if you're intent on sticking with Canon then it is an option and they really are just a mirrorless version of the the 'Rebel series'. 

In the end though, the kind of image you want comes down to several factors and its all about personal taste. This is what works for me and it may not be what your looking for, but at under £50 for 3 great prime lenses it certainly worth a look for anyone shooting on a budget who just wants more options.

MJ

IF YOU FIND THIS BLOG USEFUL. PLEASE SHARE. You can keep up to date with our filming goings on at our FACEBOOK PAGE :)


MYCHO MICROBUDGET MASSACRE MASTERCLASS

ALSO IF YOU'RE BASED IN UK, MICROBUDGET MASSACRE AND THE MILTON KEYNES FILM NETWORK ARE HOSTING THE FIRST OF THIS YEARS SPECIAL 'MYCHO MICROBUDGET MASSACRE MASTERCLASS' LIVE SHOWS ON TUESDAY 8TH MARCH.  


 Get Legacy of Thorn on DVD and Digital HD now.
ADVERTISMENT


Monday, 29 February 2016

RAISING THORN : Why I'm Glad my 1st Feature was My 3rd Feature.


4 years ago today I handed over the first draft of a script to my producer and partner Anna, I had been working on it since I was about 15 and on 29th of February 2012 I finally finished it. The date was important, I had set it as a deadline almost four years earlier, because the films story took place on February 29th, it seemed fitting. 

In all honesty I always thought Legacy of Thorn (Known as Thorn then) would be my first low budget feature, but as fate would have it, it was my third. Looking back now at all the delays and mishaps that led to the film taking almost 10 years to get off the ground it all seems like a blessing in disguise. The film happening when it did was great for a lot of reasons, the main one being, that, until that point, I hadn't really been ready to make it.

I had come up with the story when I was pretty young, initially starting life as a Halloween fan film idea of sorts, I quickly went a different direction, taking the elements from my idea that were factual and therefore I could use them with out a law suit (mainly the nordic rune elements that inspired Halloweens later sequels) and then starting with everything else from scratch. Overall it was a pretty simple concept, Kind of Halloween meets The Terminator (Two films which I always felt went hand in hand in terms of tone) but told between two time zones that ran against each other. 

The problem I always had with the traditional 'Slasher' set up, was that they always have a strong opening and then 40 minutes of downtime before they got to the 'good stuff'. The solution I eventually came to was to think of it as two films. One set on February 29th 2008 and one on February 29th 2012, the first playing backwards and the second forward. This way, not only could I break up the downtime, but I could essentially conceal important elements in the story that would feel otherwise mundane. Of course, 15 year old me would have been able to understand any of that. 

So as I tried to get the project off the ground, It never seemed to work quite how I imagined it, over the years I would try and make it work, but at the time didn't have the correct understanding of screenwriting and story structure to do so and so I focused my attention on other things. I was disheartened, because I'd always imagined it would be my first 'proper' feature. Another disguised Blessing.  


Eventually, over 10 years later, after making a butt load of horrible short films and some ok ones, I felt a little more confident that I had the filmmaking tools to make it work. By this time I was in preproduction on my actual first feature 'Creepsville' that I had started to develop with another writer after we graduated. Of course, I still wasn't sure I was ready and so I decided to makes another short film to help us get our heads round using the gear we'd be shooting on. 

I dusted off the old script for short film version of Thorn I'd written (Essentially a scene taken from the bigger movie), another writer friend of mine asked if he could polish it up, and then we shot it in an evening in my friends garage, we put it out there and people dug it, it even won first prize in the Scary or Die competition in 2009 against some pretty amazing entries. It was at that point that I started to feel like 'Thorn' should have been my first feature, and again I felt disheartened. Once again, it was a blessing in disguise. 

Creepsville came and went, It was a tough shoot and that was for a relatively simple concept. We got to the end, but the shoot had been a huge mess, After graduating University a year before, that was still a shoot that I've always considered my 'True Film School'. The film suffered in a lot of ways from my lack of experience. I thought to myself, this could have been 'Thorn', I could have fucked that up, and I felt less disheartened.

In 2009 Post on Creepsville was underway and taking a long time (I was fairly hand offs with it) and rather than sit around waiting I started working on the idea for my next film. "This time" I thought "It's sure to be Thorn". 

Then out of the blue I got wind of two films that were in production that sounded scarily similar to my 2005 feature script 'Slasher House'. I panicked, SH was one of the best ideas I'd ever had (make of that what you will) and it was a pretty low budget screenplay. One location, small cast. I realised it was now or never and I polished up the script and moved the film into preproduction in a bid to 'Get there first'. (Ironically the two film never even went under the lens). 

Thorn ended up on the back burner, but this time it felt a little better. See I had planned for Slasher House to be an ensemble movie and the 4th in a series. Thorn being 1 of 3 leading up to it, The other 2 being Hollower and Cleaver : Killer Clown. This would mean that I would have to change my whole series structure, but the upside was, Thorn played a big part in the Slasher House script. I decided that Slasher House would serve better as an introduction to these characters and we could tell their stories later on. Which we did.


Legacy of Thorn (2014)
Slasher House was shot in 2010/2011 and locked picture in 2012, the day after the Premier I receive dozens of calls and messages asking of there was was going to be a Thorn movie. By the time it came out on DVD in my homeland (The UK) Thorn was already an audience favourite. Now I felt like if there was a time for the Thorn movie, it was now, but whilst making the film, I'd had an inkling this would be the case.

Like I said at the beginning, a few months earlier on February 29th I had handed the first draft of a script to Anna and during this time I had been working on getting the final script ready. The script was HUGE and there was no way that I, as an inexperienced filmmaker, could have made it as a first feature, I mean the finale features a goddam Helicopter for crying out loud. 

The true blessing was that the film allowed itself to be ready before it would allow me to make it and I'm glad it did. Legacy of Thorn is one my proudest filmmaking achievements and had I made it earlier I'm not sure I'd be able to say that.

In February 2013 we started preproduction of Legacy of Thorn and one year later it Premiered in London on February 28th. Of course there was a whole adventure along the way, but that is another story for another Leap Year.


MJ

IF YOU FIND THIS BLOG USEFUL. PLEASE SHARE. You can keep up to date with our filming goings on at our FACEBOOK PAGE :)


 Get Legacy of Thorn on DVD and Digital HD now.
ADVERTISMENT


MYCHO MICROBUDGET MASSACRE MASTERCLASS

ALSO IF YOU'RE BASED IN UK, MICROBUDGET MASSACRE AND THE MILTON KEYNES FILM NETWORK ARE HOSTING THE FIRST OF THIS YEARS SPECIAL 'MYCHO MICROBUDGET MASSACRE MASTERCLASS' LIVE SHOWS ON TUESDAY 8TH MARCH.  


ADVERTISMENT


Monday, 8 February 2016

COLOUR GRADING IN CAMERA


Last week I talked about the advantages of getting your image how you want it 'in camera', this saves me a lot of post production work, especially when it comes to grading. A lot of projects I work on have to have a fast turn around and I know that a good deal of that will be grading the footage right at the end to give it its final look and bring out the colours and depth that the production needs.
Raw Camera Image (Ungraded/Corrected) Slasher House 2

As a general rule, I try to get my image as close to the final product and the truth is, these days, I do very little colour correction after the fact as well. There are a lot of reasons for this, but mainly because its the that I personally like to work. As usual, Its not the right way or the wrong way, just my way.

As chance would have it a friend of ours, Georgie Smibert (Who played Deputy Howells in our latest feature film 'Cleaver : Killer Clown' and our Short 'Slaypril Fools Day 5' ) needed to shoot an audition for a film role she was applying for. As recompense to our actors giving up their time to work on our stuff we're always happy to help with showreel and audition stuff  (A good habit for No budget filmmakers to get into) and she wanted to shoot the audition as a 'scene'.

We made the choice to shoot the scene as if we would shoot it on a set, but just from her angle, as if it were just that take from the overall coverage, this was mainly so the other actors didn't distract from her performance.

Now Georgie was going to cut it herself on a basic windows editor (Movie Maker I think) and so therefore I knew she wouldn't have access to correction tools or anything like that. So we decided that we would get the footage that she needed ready to go straight from camera, but it also gave me a chance to take some reference pictures in terms of how I approach colour grading.

I do my colour grading and correction 'in camera', before I even start shooting, I hate to rely on post for 'anything' and as such I approach shooting in a very practical way, so that, for the most part, I'm just making cuts and not spending weeks on trying to get colours, tones, grades right. I think about it at the time (or usually months before hand) and then make sure I get the desired image there and then.


Original 'Flat' set up for room to Grade/Colour Correct
The camera I use currently is the Panasonic G7, which give me unbelievable control over everything from Curves, to Contrast to Saturation to Colour Temperature and beyond. All things that I would tweak in post otherwise I can now just do in the camera itself. I used to a lot of this on the Canon 600d too, although that gave me a little less control overall, its still had an unbelievable amount of control via its picture profiles and my last 3 features were shot on it, I had to do very little in way of correction or grading in post even on Canon's Rebel series. I'm fairly new to the G7, but so far it makes controlling my image input a breeze.
'In Camera' Colour Correction

To me the change is very noticeable and a much nicer image. I added a 'hair light' at the rear just to bring out Georgie a little more. But that was a cool LED with no gels or filters or anything, all the colour came and depth came from just working with the cameras Profile settings to get the desired level of Contrast and Saturation and of course Colour temperature and White Balance. I also enhanced the sharpness a little too, but thats really just lends a hand with focus and as we weren't doing any post at all this would really be my only chance to fix that.

The biggest thing I've found is the use of white balance and how it drastically effects the tone of the image, I was always advised to balance to white of existing light in the room, but really experimenting with the colour balance opens up a world of style right in your camera. I may do a colour chart to demonstrate how balancing to different colours effects the image, if you want something like this, let me know in the comments below, I tried finding one online, but so far, no luck.

Anyway back to Georgie's Audition, the scene in question was quite light and fairly comedic, So I went for a brighter, lighter colour to keep the tone light, pushing the cameras colour temperature toward a warmer Orange tone. If I were doing a Horror or a Sci-Fi or a Thriller I would make a drastically different choice in terms of what colours I would balance to. This is how I apply a grade 'in camera'. 

Now, obviously this approach gives you less control in Post, but for me that is the intention. It forces me think about the decisions I make and, of course, it forces me to be a little more prepared. Now balancing to different colours can give your image a completely different feel. I'll make these choices fairly early on in larger productions and do tests with lights/gels etc to get the look that I'm after. 

Adam Dillon (Nathan from Slasher House) dropped in on his way to the Premiere of our other new feature Hollower last weekend and I stole a moment from him to demonstrate the approach and the drastic difference it can make. I had my camera set for a a few different looks I'd been working on.


So this what the original 'Normal' image looks like. Set for the the rooms natural White Balance. A fairly standard shot. To grade it i would probably pull the curves out to make the shot a little more 'Flat', like in the first example (The G7 isn't really the best for shooting flat images, so you work with what you've got) but this is pretty close to how I would shoot, if I were preparing to do colour work in post. As you can see its a fairly bland image in terms of colour. Below I've worked on some quick picture profiles, just to show how much of difference shifting colour can change the tone and style of an image. 


Obviously its a fairly quick example. On set I'd take much more time in lighting my subject and  surroundings first, but for the sake of a quick reference of what I'm talking about, this should demonstrate it fine.

All of these images are raw JPEG frames from the camera (The Panasonic G7 allows you to save stills straight from the footage in camera), uploaded straight from the card. As you can see each Grade changes the mood of the image dramatically, each one of these grades was created 'in camera' by adjusting the cameras visual settings. I used a cool LED to give me a little back light, but that was it. My camera only stores 4 looks, but really the looks you can create using just your camera are almost infinite. This is before I've even started to bring other colours into the mix using gels/filters etc.

I understand some people just won't understand my approach, its extremely counter intuitive to the way most people have become used to working, you just have to look at a modern standard film workflow and how big a part 'grading' and 'colour correction' play in that to know why this approach won't suit everyone. It 'sometimes' doesn't suit what I'm doing either, as I talked about last week. If I can though, this is my preferred way to work, to me I see it like painting on set and its a lot of fun. 

This is just one of the many ways I work, and it suites me, it might not suit you, but for me filmmaking has always been about thinking outside the box and trying things that are new to me.  

MJ

IF YOU FIND THIS BLOG USEFUL. PLEASE SHARE. You can keep up to date with our filming goings on at our FACEBOOK PAGE :)

Monday, 25 January 2016

EDITING 4K ON A BUDGET


One of the biggest complaints against using 4K is how it affects workflow when it comes to editing, this concern comes from the fact that shooting in 4k obviously creates way more data to manage. I'll admit that when I decided to make the jump to a camera that shoots 4K I too was concerned about how much it would slow me down, or even if I'd be able to do it at all.

I made the choice of getting a camera that could shoot HD 1080p very well, but gave me the option to shoot 4K when I was ready. 

Now my machines are both Mac, I find their build quality and functionally worth the amount I pay for them, people may disagree but I've edited on both low end Macs and high end PC's and personally have had no end of trouble when it comes to anything powered by Microsoft, which is a shame as their choices in editing software are actually more to my preference. 


My system spec for my 2011 iMac
Either way, this is just my opinion, editing on whatever you're comfortable with should be your main goal.

The truth was, however, that cutting on my 2011 out of the box iMac just wasn't as taxing as I had been led to believe. My machine has cut several features and dozens of music videos using Macs standard Graphics Card and only 4GB RAM. That sounds insane right? But it managed, not only fine, but actually quite fast.

Editing 4k on the other hand, well thats a different matter, but 3 months into editing a 4K feature and the same system handles it just fine. Pulling the footage from an external self powered USB 3.0 harddrive (which are very inexpensive at £60/$90 for 2TB, I consider that to be a very good deal.) and it really doesn't have any problem pulling the footage from it during the edit.

The problem it really has is playing back the footage in realtime. The computer really doesn't like it, even in 'Preview' or 'Quicktime' it struggles. The workaround for me was very simple and it should work in any non linear editor on any system.

Note : I did try this on Final Cut 7, but because of how the program uses your Memory it really just couldn't do it. But it works fine on programs like Hitfilm, Premiere Pro CC and FCPX (and probably Sony Vegas too, although I can't say for sure).   

___________________________________________________________

4K WORK AROUND

Creating ProRes LT proxies I was able to load the footage into a 1080 timeline (all of it) Like a strip of film and then leave it to render. depending on what I've shot, it usually takes around 20 minutes to render the 4K footage for a 3-5 minute scene on my current set up.

Then I just work my way through and remove all the footage I don't want and of course you are left with your scene. Its very similar to cutting and arranging a strip of celluloid.

After that I simply copy and paste the footage back into a 4K timeline, which is linking back to the 4K footage and then export. 

Now I have a 4K master that I can use to export my films to HD, whilst having both a better quality image AND my work ready in a higher resolution for when its needed down the line. All done on a low spec, lowest price, out of the box iMac. 

___________________________________________________________

PLEASE NOTE : I am aware of the Proxy media approach (creating a lower quality clip for editing) however this, for some reason, still causes major slowdown on a low spec system, which I assume is down to having an initial 4K timeline. My system even warns me that this will happen when I try it.
This work around is essentially a way of making your own proxies as you need them in your timeline without having a playback issue. 

P.S. Remember to empty your cache when done to remove the unused render files when done with your cut.
___________________________________________________________


Now this probably sounds backwards to most editors out there, and it is, for me too, but its a work around that saves me having to drop money I don't have on extra RAM and the result is fine. 

The fact is, it has made me a more efficient filmmaker, knowing that the more coverage I have to shoot means a more taxing time in the edit means that I shoot what I need to much more efficient standard to make my life easier when I come to cutting the footage. 
Raw footage from Panasonic LX100 : Slasher House 2

Is 4K harder to edit than 1080? Of course it is, you're dealing with 4 times the information and unless you're willing to drop extra cash on your system to make it top notch, then, like every other part of low budget filmmaking, you have to find a way to make it work.

My overall point here, is that, filmmaking overall is a series of challenges. From writing to production to post and you need to keep all of these thing in mind, overlooking the whole journey whilst you're working. It doesn't matter if you're shooting SD, HD, 4K, 8K or 50K, you should be thinking about your whole process from beginning to end and how what you are doing on set will affect your post production. 

Just remember that resolution is a very small part of what makes an image look great.

MJ

IF YOU FIND THIS BLOG USEFUL. PLEASE SHARE. You can keep up to date with our filming goings on at our FACEBOOK PAGE :)