Showing posts with label film locations. Show all posts

Tuesday, 24 May 2016

NIGHT SHOOTING : FILMING ON LOCATION AT NIGHT

Shooting at night s probably one of the toughest things you can attempt as a low budget filmmaker, this is because, no matter what you are shooting on, your camera needs a good amount of light to capture a good quality image. Shooting at night reduces your light sources drastically if you are shooting in urban areas and if you are shooting in the woods, the middle of country side or even somewhere that isn't usually accessed after dark it becomes even trickier business to get that light onto your cameras sensor.

One work around is to shoot 'Day for Night', which involves shooting the scene in sunlight (works best shooting on  cloudy/overcast day) and then grading in post to make the image look a little like twilight. I tried this early on when I started making films and really hated the results, I've always found it better to shoot in darkness and bring in whatever light I can. The result is always a far better image.

Having a budget usually solves this problem by hiring huge spotlights and generators to help make up for the lack of good light, but this is expensive and something that is usually saved for large budget productions. If you, like us, are usually make stuff on spit and buttons, then you'll need to come up with more creative solutions to work around your lack of light.

Here are 3 tips to help you get the most out of shooting at night and how to take that into account when you are looking for your location.

1. PICK YOUR LOCATION WISELY

The easiest way you can start to combat shooting at night is by picking your location wisely. A few years ago, when we were working on preproduction for Creepsville, I would wonder around at night looking for the best lit streets, alleys, carparks, you name it and once there I would look at how much light is already there from street lamps, security lights. Then I would look at what other extraneous light sources there were like shops signs, obviously the more light the better. This means less light I have to bring along with me, which in turns means less disturbing people and less drawing attention to yourself.

Legacy of Thorn (2014)
On Legacy of Thorn, when it came time to shoot the infamous 'bridge scene', I spent months looking for a bridge that we could shoot on without being disturbed that would also give us enough light to cover the action. The first one we tried, we scoped during the day, took note that it had street lights above it and figured it would give us enough light. On returning in the evening, not only did we find that most of the street lights were broken, but it was also a well known hangout for crackheads who made themselves a problem very quickly.

We eventually found something closer to home that fit perfectly and although it had some street lighting, we still had to make up the difference with our own portable flood lights.

 Get Legacy of Thorn on DVD and Digital HD now.
ADVERTISMENT

2. PORTABLE LED LIGHTS

Chances are, if you are out shooting in the woods, on the street or in an abandoned factory at night, you're not going to have access to power. This always something I try to avoid, simply to make life easier for us and give us more freedom in lighting. However, if its not possible, we bring out the portable, rechargeable LED'S. These are bright flood lights that charge on the mains and give around 3 Hours + of continuous use and weigh next to nothing. They are fairly harsh, but used correctly (with gels or diffusion) are a great way to light dim sets when there is no good natural light. They cost around £45 each when I bought them in 2013, there are now better cheaper options out there too.


Cleaver : Rise of The Killer Clown (2015)
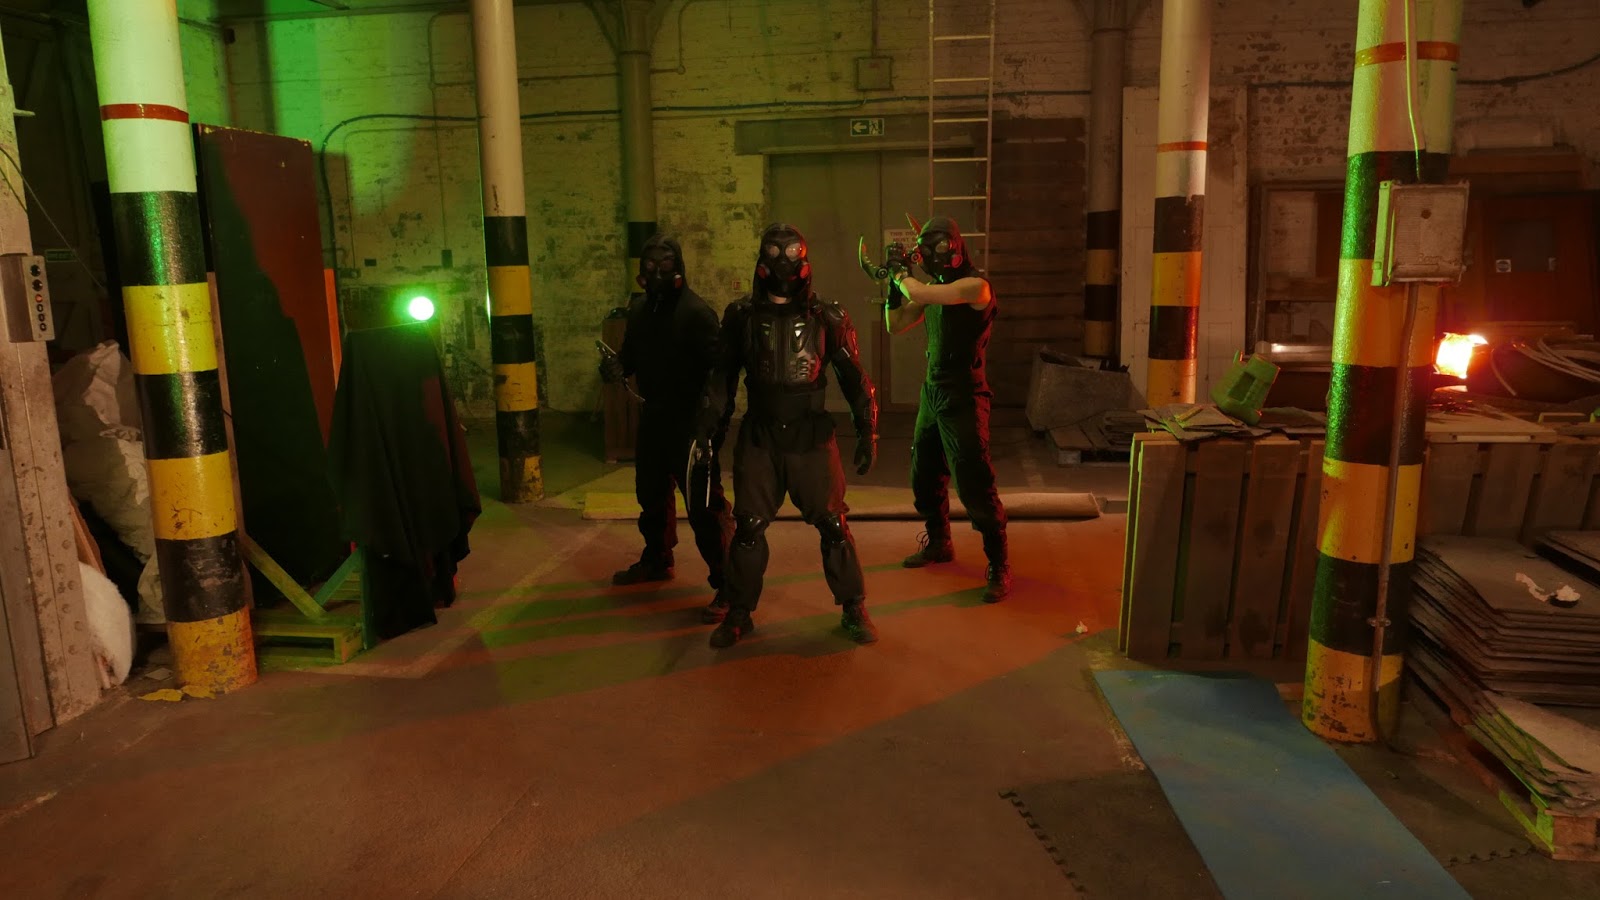
On shooting Cleaver : Rise of The Killer Clown, we were shooting a scene in a car, in the middle of the night, in a residential area. The last thing we wanted to do was pull a generator out there, or we certainly want to run cables across the road. The street lamps gave us some coverage, but nowhere near enough once our actress was in the vehicle. In stead we matched the street light colour on LED's with gels and just used whoever was free as light stands. It matched the natural light, but it gave us the extra light we needed to make the scene more visible.

Cleaver : Rise of The Killer Clown (2015)
These lights are great in place of having to drag a noisy generator down and even then it takes an expensive generator to run even our low wattage work lights, never mind our red heads or spotlights. Using these also means that should we need to, we can use a smaller generator to run other low power things like charging stations and smoke machines.

P.S. Before I could afford my own portable LED'S I made some for about £5/$7 each, find out how HERE.

3. FAST LENSES

One the best weapons to combat low light situations is using a fast lens on your camera. This is something that wasn't even really a choice when I started out filmmaking, if your camera's fixed lens sucked in low light (which they all did) then that was that. Now even the most inexpensive DSLR'S can capture great low light images with the right lens attached,  If you're shooting on an interchange lens system camera, you should try and have at least one fast lens that opens to at least f/1.8. This will help you get more light into your camera and make picking up a usable image just that little bit easier. Its best not rely on this, but it can give you that extra boost once you've done the above. There are also cameras like the Sony A7S/A7S2/A6300 that can shoot in incredibly low light with out damaging your image, but I still advise taking location and lighting into account even with miracle cameras like that available.

When shooting the infamous 'Bridge Scene' on Legacy of Thorn, even with choosing the best location for light and having the portables there, I still ended up shooting almost every shot on my Canon 50mm f/1.8 to get a better image. The downside of this is that the depth of the image was very shallow, but the upside was that I got a better image and because we were shooting in a wide open space it meant that the close focal length didn't impact what I wanted to get too much.

These days if we're shooting outdoors I try to plan my shots around the widest opening lenses that I have. Its not always possible, but its worth thinking about.

_____________________________________________________________

MJ

IF YOU FIND THIS BLOG USEFUL. PLEASE SHARE. You can keep up to date with our filming goings on at our FACEBOOK PAGE :)

ADVERTISMENT


Tuesday, 17 May 2016

THE WAPAH!! CHECK LIST : 5 Ways to Check Your Location Has EVERYTHING You Need.


So you've found the perfect place to shoot. It has the right aesthetic for your films tone and its functionality matches your script perfectly, but there are some things that you'll want to bear in mind before you start booking your cast and crew.

Once you've found your location, we talked about some ways to do that HERE, you'll need to make sure that it suits your needs and that its a viable venue to set your movie. Not all locations are created equal and there are 5 things that you need to look at to make sure that where you want to shoot works for you. 

I created something called 'THE WAPAH!! CHECK LIST', which are 5 things that you should look at when you are scouting for places to ideally shoot your next film.

WATER
One of the first things I do is check that there is running water on location. Especially if you are going to spend any length of time there. It seems like something that wouldn't be that important, but if you don't have access to running water, trust me, you notice fast. This could just be a bathroom or kitchen and if you are shooting in a standard suburban house or commercial facility then, chances are, that they'll be water for bathrooms/washing/cleaning up/doing hair and makeup/special effects etc. 
Legacy of Thorn (2014)

However when you're out shooting in warehouses, old buildings and abandoned places (as well as out in nature) Water starts to become harder to come by. This is where you need to figure out how much water you need to bring yourself,  for people and for functionality. Drinking water should always be brought anyway (don't EVER let your cast and crew drink from taps in abandoned or old buildings), but you should be aware of how much you need and what you need it for. 

On Slasher House and Legacy of Thorn, we shot in old, non functioning government buildings. They had electricity and some running water (only cold), but there was no water flow to the showers in either case. This was a problem when most people returned from shooting each evening covered in dirt and sticky blood. Obviously before we got there we had to figure out a solution to that. Which brings us to...

AMENITIES  
Based on how much access and the type of access we have to water and facilities, I then look at the local amenities to figure out just how far we'll have to travel to do things like shower/use the bathroom/get refreshments. This should, again, give you a good idea of what you need to bring in terms of equipment, food, water and what you can have access to on the day. What shops are available locally? How far is it to get to them?

The distance between your set and your amenities can make a huge difference. If you're working with a small crew and suddenly someone you NEED has to take a 90 minute round trip to pick up food or take an actor to the bathroom or what have you then you are gonna see a lot of downtime when you're not shooting and this is when thing start to overrun and cause problems. Also, if you've every met an actor who can't shower for a couple of days, then you'll understand how important it is to find somewhere for them to wash regularly. 

On Legacy of Thorn, the school we shot in (and lived in) for 14 days, had electricity and running cold water, but then water only ran in the admin building and not to the showers down in the sports block. We bought solar showers as it was the height of summer, but they were less than successful, luckily we had scoped out the leisure centre before hand, about 20 minutes down the road and told them what we were up to, they agreed to let us use their showers and we scheduled in time in the day for actors (and then crew) to go and get washed if they needed. 

POWER
Obviously if you are shooting a movie, you are probably gonna need power. Although not in all instances, which is why its actually 3rd on the list (that and it helps me spell WAPAH by being here). After checking our water supply and amenities I look to see how much power (if any we have). How many power points are there? Are the functional? Are they wired safely? How many extensions will we need to set up how many lights? This way I can plan exactly what I need to pack in terms of power/lights and if we need a generator or not.

If we're shooting outdoors, we use rechargeable led lights and scout with that in mind to try and find places with decent natural light already, If we're shooting in the day, this becomes less of an issue obviously and its entirely possible to shoot with natural light and some reflectors. If you're shooting in doors at night you'll probably need power. This is also useful for things like recharging gear, batteries, running footage off the camera and making cups of tea (The most important use of power on a British set). 

On Slasher House 2, we needed to shoot in a graveyard, but getting power out there was a problem that we found impossible to solve. To try and regain control over lighting, we asked a lovely friend of ours who had helped us out on a previous film, if we could use there expansive garden to build a graveyard and run power from the house. The only problem is that they only had one outlet we could run power from, we thought it would be enough at a push and very quickly we started to find that we would lose power to the 3000 watts worth of lights we were running. This meant having to pause filming every 20 minutes of so in the pitch black on a -1 December evening. Make sure you have enough outlets to run your equipment properly.


ADVERTISMENT
ACCESS
What kind of access you have to your location is important and it will ultimately determine if the location is right for your shoot. Can you only get in to the location at certain times? Can you access it around the clock? Is it a 6 hour drive away from base camp? Is it near any civilisation at all? Can you drive to it or do you have walk on foot? There is a huge list of things that will make getting to a location a problem and you sometimes have to weight up if that location is worth using if its too difficult to get to.

You also want to be aware about how long you have at the location, if you need to work around a business then you will probably be shooting after hours, if you need nightfall then you'll have to check that you have access at night. Its worth checking if you can house your cast and crew there to. The easiest shoots i've had are the ones where we lived on set (or in the same complex) as there wasn't travel to worry about or driving back and forth from location every day. Plus it makes its easier for everyone to bond.

On Slasher House 2, we had our main location around the clock, which was fine as we needed to shoot at night because of the locations huge factory windows, we just couldn't cover them. This was fine as we could get in anytime we wanted, The only stipulation was that if we didn't leave by 10 when the gates closed, then we had to stay until 5 in the morning when the gates opened. This led to either having to rush through what we were doing as soon as it got dark, or finishing in the small hours in the cold and then having wait to leave. It took us a while to try and swing the right balance, so its important to try and factor these things early on if you can.

HEALTH AND SAFETY
After I've checked all the above, I then do a huge sweeping check that I consider the MOST IMPORTANT one of all. Health and Safety. This really goes to looking at most of the previous things over all, Is the power safe? Is there enough water to clean wounds? (Real ones rather than sfx) Where is the nearest hospital? The nearest first aid kit? and then I look at what has to happen in the scenes and looks at where our actors will be and how to keep them out of as much danger as possible. Looking for things like loose flooring, nails, low hanging roofs, doors, wires anything that I think might be a hazard and just look at what I need to stay away from and what I can clean up or make safe again. 

Its most important of all to keep you cast and crew safe. If they are going to be crawling around of the floor then I'll make sure its swept and that any sharp objects are removed and just generally try and make it as comfortable as possible without ruining the aesthetic. If there are any stunts, I look at how we are going to do them safely and securely and wether we'll need mats or not. A lot of it is really just common sense, like "don't touch that live wire", "Don't hold that 1000 watt light with your hands" or "don't kick this pile of asbestos boards thinking they are plaster" (That one was me on my first shoot). 

Also and this is a BIG ONE : Make sure you have Insurance, even if you are just making a little no budget movie, make sure that have insurance that covers you in case of any accidents to your actors and the public, you'll save yourself a load of problems should the worst happen. In all honesty there have been very few accidents on our sets, Thats probably down to a mixture of luck and planning, things do just happen, especially when people are in the heat of the moment during a performance and all you can do is do your best to try and account for what could go wrong. Just be careful and ask your actors and crew to do the same, but try and stay safe.


___________________________________________________________________


MJ

IF YOU FIND THIS BLOG USEFUL. PLEASE SHARE. You can keep up to date with our filming goings on at our FACEBOOK PAGE :)

 Get Legacy of Thorn on DVD and Digital HD now.
ADVERTISMENT


Tuesday, 10 May 2016

FINDING LOCATIONS : 3 Easy Ways to Find Your Next Film Set


As we've talked about before, finding the right location can make or break your movie. Shooting your film in the right place adds so much production in terms of style, look and value that to over look it is setting yourself off on the wrong foot.

In big budget movies, it not uncommon for sets to be built on a sound stage wherever possible, this is usually due to the amount of control the creative team needs over the set, i.e being able to remove walls, lighting, shooting around the clock. If you're shooting on a budget its unlikely (although not impossible) that you can build your 'Church Interior' or 'Canadian wilderness' from scratch as a set on a sound stage. This usually means that you have to find something the preexists in the world.

This is both a blessing and a curse. Finding a pre-existing location means that you have less control over things like weather, power, access, angles, food establishments and the list varies drastically from place to place, meaning a lot of prep and compromise most of the time. The upside however, is that you get something real, something that you can't build, something raw and lived in and that is really what adds the value to your films.

FINDING YOUR LOCATION

Following are 3 ways of sourcing locations when you are working on a limited budget, These 'suggestions' are by no means the best , or the only, ways of finding the right location for your film, but hopefully they'll help you think creatively about what you need and help you look at where you shoot in more productive way.

1. UNIQUE CIRCUMSTANCES

Douglas Prison : Isle of Man
Finding locations can be tough going. Especially if you need anything outside of student flat or family home, things start getting difficult pretty quickly. This is when you need to employ some of your unique circumstances to finding what you need. By 'Unique Circumstances' I mean this, Everyone has access to something unique that no body else has access to, in terms of locations.

This is basically looking at what you have access to personally. Can you make a film out that creepy looking shack your dad built at the bottom on the garden? Does your Aunt work at a High School after hours? Does your mate have the keys to the warehouse on a weekend? All these are great starting points to finding a great location to shoot in that isn't 'Mark's Studio Apartment' and also a brilliant way of getting the creative juices flowing. There a few things than coming up with a  scene or even an entire film based around an amazing location. 

I always 'try' to write locations based on something I know we have or can get access too, even if that means taking a pause from writing for a moment and throwing it out there to people I know with a "Does anyone have access to..." and usually I receive a "No, But I have access to...", sometimes this will dictate where the film is set and sometimes the direction a film will go.  You have to be creative and compromise when it comes to low budget filmmaking. 

Slasher House (2012) Douglas Prison : Isle of Man 

For Example, I originally wrote Slasher House to take place in an old run down mansion, when we were offered an abandoned prison, it was too good to pass up and we adapted and it worked out for the better, both visually and thematically. It also meant we had to adapt one scene to be set in a 'Gallows' which was a pretty awesome, if not terrifying, experience and also added another dimension to the film.

ADVERTISMENT
2. YOUR NETWORK

After you've spent your first couple of movies exhausting and exhausted your family and friends locations, you should have begun to develop a 'network' of people to work with, to show your work to and who also make movies. This is your community and these are the people you can turn to for help. 

Other filmmakers are a great conduit for resources, this is because, just like you, they spend their time making movies and, believe or not, have come up against most the same problems you have when it comes to getting locations and come out the other side. Its a great way to to find creative solutions to problems, by talking to people who have already solved those problems and getting their advice.

The biggest advantage of this, is that it gives you a new perspective and helps you think outside the box. One of the biggest mistakes I see people making in terms of locations is that they need something so they look for "INSERT LOCATION HERE" and that alone, when one of the key ways to solve the problem is finding something that can do the same job, but provides earlier access. Other filmmakers will have been through this and will be able to help advise you and what can substitute your needed set. 

Legacy of Thorn (2014) : High School Oldham : Main Building
Legacy of Thorn (2014) : High School Oldham : DT BLOCK
What I mean is, for example, on Legacy of Thorn we needed a hospital, but getting one that looked operational was tougher than we could have imagined. Instead we found a section of our old college that looked very similar to a hospital corridor (along with first aid room) and dressed it up to stand in for it. Throwing in some posters, a couple of extras in long white coats and nurses uniforms and we had a what we wanted but without the red tape of shooting a real hospital. 

Sometimes its worth talking to other filmmakers about how they made it appear that they shot in a location.

3.  JUST ASK

Possibly the simplest approach to finding the right location is to find the location you are after and just ask. It seems like there might be more to it, but its really as easy as that. Sometimes if we need a specific location we just find the place we want and then ask. Sometimes we're successful and sometimes not, but no one has ever done anything worse than say 'No'. Usually people just want you to cover electric or a small charge to use it, sometimes they might even just let you have it for free as long as it doesn't conflict with business hours etc.

The real issue with this approach is that it can become a numbers game and thats a lot of ground work, but if you're willing to put that work in, you'll almost certainly find the location that you're after. Just find the type of location you're looking for and make a list of suitable candidates, from here your kind of politely cold calling and explaining your project and what you want to do. Some people won't care, some will be interested, but won't be able to help you and you'll come across those who will do whatever they can to accommodate what you're doing. Its pretty much that simple.

Slasher House 2 (2016) Warehouse 
Slasher House 2 (2016) : Warehouse
For Slasher House 2, we needed a government facility (or something that could pass for one). We actually live in the town that has the government facility that solved the Enigma Code (now a tourist attraction), but they were a flat out 'NO' out of the gate. We decided that we would have to found something that could work instead of and figured a 'Lazer Quest' could work. We emailed every Lazer Quest in a 100 miles radius and out of 25 we got a response from 2, we met with one. It didn't work out due to the times we needed, but we had the location should we want it. 

We eventually went in a different direction that worked out better for us, but I'll talk about that in a future blog. 


___________________________________________________________________

I should point out, that its important to be honest and up front here, telling them you're shooting a family drama when really you're shooting a gore soaked torture porn is counter productive when you turn up on the day and start spraying the place down with food colouring and syrup and if they think they've been fooled, chances of them signing a release form are slim and even if they do and then find out they've been lied to they'll just flat out refuse the next filmmaker that come knocking and its your job to make sure that we pave the way for everybody in the community.

Just like any aspect of filmmaking, employing creative thinking is your friend and if you think about what you need in front of the camera creatively you might even surprise yourself in what you come up with what you think of outside the box or sometimes its as simple as just asking. 

MJ

IF YOU FIND THIS BLOG USEFUL. PLEASE SHARE. You can keep up to date with our filming goings on at our FACEBOOK PAGE :)

 Get Legacy of Thorn on DVD and Digital HD now.
ADVERTISMENT


Monday, 4 January 2016

THE ULTIMATE FILMMAKER TOOL : THE IPAD - THE FILMMAKERS BEST FRIEND


**PLEASE NOTE : I am not sponsored by Apple in any way to write this post , if I was, I would hope they'd send me something better than an outdated, refurbished iPad 2.
You should also note that I'm a Mac user so it made sense for me to go with the iPad, but I'm sure that a cheaper Android (or other) tablet can do just as good a job as this thing.

A decade or so ago, back when I was making short films on a camera the size of a small car (joking of course, but not by much) I remember the feeling of dread as I would stare at the boxes and boxes of equipment and paperwork that needed to be lugged along with me for even the smallest shoot.

Hell, even just doing a reccee (Location scout) would involve me having to load up a large rucksack or sometimes a car with a stills camera, video camera, pile of paper work, scripts, notepads, sketchpads and various other 'useful' items and that was just to look over  a suitable location.

When I started pre production on Legacy of Thorn (My 3rd feature) in 2013 I was looking for a solution for something completely different. For years I had used an old chalk slate to sync sound, but that always seemed a little cheap and we were trying to take a step up.

Looking into a new slate, I started to notice how expensive they were, for a piece of plastic that you write some stuff on they were fairly over priced and electronic ones were 100's of pounds out of our budget. Looking into low budget solutions I discovered that you could actually load one of these things onto an iPad via an app. The only problem was that an iPad cost about 4-8 times more than your standard chalk slate.

After some research I discovered that I could pick up a refurbished iPad 2 for £200 * (which was just over double what I would have paid for the plastic white board slate) and that would come with a decent 16gb memory, that seemed like a good deal if it could do what I needed it to do, but that wasn't quite enough for me to pull the trigger on it. I did some more research.

*You can get a much more up to date iPad for much less than paid for this one today.

To make the investment worth while it needed to be able to take over more than just just marking
duties, it would have to be able to do a whole lot more. It became obvious to me very quickly that not only would I be able to do a great deal of other things on using this little device that could slip in my shoulder bag, in fact, I could almost cover my entire creative process from start to finish.

So here is a list of of the apps I use throughout production from start to finish, some are free, some are cheap, But i've made a point to never spend more than a few pounds/bucks on anything to go with it. So lets get started.

PRE PRODUCTION :

CELTX (£7/$10)
Celtx is a paid app, it costs about £7($10) and although there are free apps out there that do a similar job, I use Celtx on my main laptop and desktop for writing when I'm at home so it made sense to have an app that would be compatible with the scripts I had already written.

The app itself is fairly similar to the desktop edition, with a few things tweaked to make it work with touch screen tech, but nothing major. Since I got the app I've actually written two features on it from start to finish, the small screen size makes navigation a bit more difficult, but its certainly possible to use the app to write your next film.

I paired it with an iMac keyboard to make typing more comfortable, but in a pinch its fine to use the touch screen keys if your out on the road. It doesn't feature then Prose setting that the desktop version has, but that seems tone all thats missing.


PAPER (Free)
Paper is probably the best app on the iPad in terms of sheer value and power, in the last 2 years I've watched it go from a fairly capable, if somewhat limited, tool to a powerhouse for tablet artists. The original version came with one pen tool and a limited colour set. I bought the extra art tools for about £5 and it really opened the app up for me.

The app now comes with all these tools as standard and its still free on IOS. I've used this app for everything from costume design, to storyboarding, to expressing ideas to cast and crew and plotting out movies. Its an extremely powerful tool and probably my favourite to use.

There is an official 'pencil' you can buy for about £50, but i've found that a basic Stylus from poundland (Comes in a pack of 2) works just as good :)


CAMERA (Free)
Your iPad comes with a camera app as standard and its improving all the time with updates and added features. Now instead of taking a whole bunch of gear to a location for reccee's I simply take the iPad and run off some pictures through there.

The biggest advantage of this is that I can send them to other crew members instantly via dropbox, or the cloud and of course I can skim back through them with ease to show team members what we found there.

Its exposure and focus is automatic so it not really any good for judging light levels or anything like that, for that I would take a smaller camera rig if needed, but for grabbing reference pictures its perfect and it means I have my notepad at the ready on the same device should I need to take notes.


VIDEO (Free)
Another app that comes as standard and another app that is extremely useful. Its really just a  functional extension of the camera app and comes with same exposure and focus draw backs, but it has a fair few uses.

There is an app called FilmicPro that costs about £3($5) but it does give you control over exposure/focus.

First of all, Videos of location can be more helpful than stills at times and if I can't make a scout, its amazing to be able to have a video sent over to me from the location. We never set foot in the location from Slasher House before shooting as it was essentially in another country on a small island. Our contact there sent us a video of the place and we could judge its suitability from that.

One of its more interesting uses is the ability to video storyboard. I'll quite often shoot a video storyboard of a scene during a scout to make sure that the location has all my desired angles and if it doesn't what do they have to be changed to. The best part about doing it on your tablet is that you can be cutting the video storyboard (I'll talk about that later) in the car on the way home, If you're not driving that is.

PRODUCTION :

MARKER SLATE (Free)
The main reason I invested in the tablet in the first place was that I was aware that I could use it as a Clapper board and it would look a little bit more professional than using the old skool chalk board that I'd use for the last few years. It was only researching all these other things that it could do that really sealed the deal for me.

If you're shooting sync audio, which we usually do, then you'll usually need to be marking each shot with a slate. The View Finder Marker Slate is free, its a pretty basic clapper, but its everything I need when it comes down to finding and syncing shots in the edit.

There are probably much better slate apps out there, in fact, I know there are, but they cost a fair chunk for an app and the free one I use works just fine.


SIDE BOOKS (Free/£1.50 unlimited docs) 
The days of having dozens of paper copies of the script littering the set are over. We can now take our script in the same slimline package as everything else and share it out with the rest of the cast and crew to read on their phone or tablet.

Side Books is another free app, I just transfer the script onto it before we go to the shoot and then I have instant access to it when we need to check anything or run dialogue. It really cuts down on having a lot of extra paper to carry around etc. Now we can even use it to have people sign releases etc.

I believe there is an extra charge to store more documents of about £1.50, but it stores half a dozen documents as standard as far as I remember.

Note : we usually do have one hard copy just in case. 


LENS+ (Free)
As I've said before, you could easily shoot a decent looking movie on a phone or an iPad now (especially with the quality of the camera in the newer iPhones which now shoot in 4k), whilst the camera app built in to the iPad is pretty basic, Lens+ allows you to emulate some cool, old skool film stocks in the camera itself and it leads to some fun results.

It is by no means professional looking, but its fairly useful for specific tasks. I used it to shoot some old style movie footage on the go a while ago for a prospective project that came out great and I tend to use it for shooting some pretentious behind the scenes on music videos which is pretty awesome if you're a hipster.


PLAY MEMORIES & PANASONIC IMAGE APP (Free)
This a quite app specific, but as I currently use Panasonic Lumix and Sony Action cams these two apps respectively let me use the iPad as a monitor for those awkward shots, such as crane shots, high shots where I can't get a good look at the LCD.

Sometimes I will just use it as general monitor, although being self shooter that doesn't come into play too much, but it is incredibly useful for the action cam that does have an onboard monitor and the Panasonic app even allows you to control the camera remotely.


INSTAGRAM (Free)
Instagram is one of those apps that everyone uses these days. The main reason I find it so useful is that I can take, edit and share pictures directly to our Facebook/Twitter etc from it in seconds and thats very helpful when you're out on set.

Usually we're shooting in some abandoned school, factory, prison, wasteland etc and so wifi access on our sets is usually impossible. If we're shooting for 14 days, that could mean 14 days blackout on social media pages, which as a growing company is not good.

Instagram gives me the ability to send picture updates from set quickly and efficiently using my data plan. It also means that I can snap a picture, upload and then be back to shooting in seconds. You can do it with other social media apps these days, but this my favourite.

POST PRODUCTION :

IMOVIE (£3/$5)
IMovie for IOS is a touch screen, stripped down version of the app that comes pre loaded on Apple machines. This is by no means a pro grade editor, but for cutting quick pre vis stuff on set, its an absolute godsend.

Its does cost about £3/$5 or something like that. but its well worth the money if your looking for something that can do basic edits on the run. That said, with enough storage space on an modern iPad, i'm convinced you could cut at least a short film on one of these things.

I don't use this one as often as I should, but its nice to know its available to me should I need to do editing on the move. Like the desktop version its a very powerful tool, even if its missing one or two of the apps features.


GARAGE BAND (£3/$5)
This is probably my favourite app. Its a touch screen version of the program that comes free with any Apple System although this version will only set you back around £3/$5, it lacks some of the desktops editions functionality, but it more than makes up from it with touch screen keyboards, drums and things like Smart Guitar and Bass and even a full Orchestra at the end of your fingers.

This is one of those programs that I couldn't do without. I've written entire scores and albums using this thing, as well as it being useful for creating general ambience for projects, trailers etc. For about £10 you can also pick up an 'Irig' that will let you plug in mics, guitars and even a full mixing desk should you want to.

I use it as is and its full array of instruments is really incredible and the best part is that you can export your projects to the larger desktop version if needed to take advantage of the mastering tools, a larger array of sounds and of course in my case, auto tune ;)


PHOTOSHOP TOUCH (£7/$10)
This is about £7 and the most expensive app I own I think. Its another stripped down touch screen version of a desktop program, this time its Adobe Photoshop, but it has a lot of the functionality that the full program has, albeit a lite version. It is a bit of fuss to get your head around but its extremely useful for doing any graphic design work on the go.

I use it mainly for colouring as that seems to be its strong point, I can use the Paper app to sketch something out, do some quick, decent quality colouring in the Photoshop app and then message it straight over to cast and crew so they have an idea of whatever it I'm talking about in terms of colour for sets, costumes in my designs. It also has some cool features and filters that are similar to the ones found in the full version.


BLOGGER (Free)
If, like me, you keep online production diaries and write for blogs such as this one, then the FREE Blogger app is perfect. Almost 90% of the posts on this blog were at least drafted via the app. Its almost as fully functional as the full browser version, which of course you can still use via the tablets web app if needs be.

I use it all the time and its super handy to have on set or at home. I'm working on this blog write now using it and I figured it was good app to end on.

______________________________________


I've been using this outdated, refurb now for over 2 years and I've never felt the need to replace it. I use it day in day out across the entire creative process and beyond it. Its not just a tool I take on set, its a tool that I use all day every day to help me keep on top of all my film related tasks.

It really is the most impressive tool in my whole kit and even though my screen is cracked and its grubby from its time spent in warehouses and abandoned buildings it comes with me everywhere and beyond its filmmaking uses, it serves as a great way to watch movies if I find myself at a loose end and that to me is what makes it a filmmakers best friend.


MJ

IF YOU FIND THIS BLOG USEFUL. PLEASE SHARE. You can keep up to date with our filming goings on at our FACEBOOK PAGE :)


Wednesday, 30 April 2014

SEEING THE LIGHT : £5 DIY LED lights

MJ Dixon is an Award Winning Filmmaker and Director of Low Budget worldwide releases includingSlasher House and Legacy Of Thorn. He has also seen over 30 music videos and shorts appear on major TV channels around the world as well as running filming workshop The Micro Budget Massacre. He mostly spends his time leaping from life to life, striving to put right what once went wrong and hoping each time that his next leap, will be the leap home.

READ FIRST!! Once again, please understand that this is just my outlook and opinion on aspects of filmmaking, Im not saying its right or wrong, it's just how I do things and how I view things, Filmmaking is about listening to everyone, your peers, professionals and everything in-between. This article is here to be nothing more than helpful to people looking to make movies, hopefully thats you.


The simple fact is, production gear can be expensive. Sometimes really expensive, I lately looked into getting some professional led panels for studio shoot and discovers that to get 2 (in reality I would need at least 3) would cost me well over £1000 . Which as a low budget film producer and video director just doesn't come easy. I also understand that money doesn't grow on trees for those of you just starting out, who want to learn the craft of filmmaking. 

A few years ago I was booked by a band to make a professional music video, It was one of my first as an official company and so I wanted to keep it self sufficient. I didn't have a lot of gear at the time as I was just starting out. The video needed some lights and a black backdrop and through some careful planning I managed to pick that up with the deposit the band gave me. However it left me little money left for the rest of the video.

A lot of the scenes they wanted in thier story element needed to be shot outside on the streets and I couldn't take my newly bought plastering worklights because I couldn't afford a generator at the time to run them. So I knew I needed a portable light of some kind, however anything useable and bright enough was well out of my budget. After wandering around the £1 store one day, I came across the I perfect solution.

I found some ultra bright head torches for £1 each, they ran in AA batteries and were pretty bright, brighter than any other LEDs I go had come across. But not still bright enough. I needed a way to triple the power of them.

 Hollow Demise Video Still. Lit with LEDs in an underpants box. 
At home I had a cardboard window box from some underwear I had had gotten for Christmas. I bought a couple of the lights and realised that they lights slotted in perfectly. I dropped 4 lights in and closed the plastic Perspex of the box top over the lamps and it worked perfectly. Actually, too perfectly, the light was too harsh. A sheet of kitchen roll later and the light was diffused enough to use, Albiet handheld. 

Being made of a cardboard box meant that the light probably didn't have too much shelf life, but it worked in the in the rain for the duration of the shoot. It did however mean that I could reinvent the light to have more longevity. 

So I invented the Tupperlight.


Tupperware tub £1, Bright LED Head Torch £1 x 3, 12 Kodak Batteries £1


Make sure your box fits the lights tight to stop them from moving during use. 


Add A thin sheet on Kitchen roll for Diffusion if needed. 

This is by no means a 'perfect' solution, it has to be hand held for a start (although i'm sure it would be easy enough to mount of a light stand), but it works and is perfect on a low budget. Everything I needed to build this light featured here, I picked up for £4 (+ £1 for 12 low voltage batteries), This one has three lights, which is fine, my original had four, Although you can make a bigger one with a larger casing with as ,many lights as you want. 

No budget Filmmaking is just about being creative with what you have and even though i have since replaced this cheap solution with more reliable lights I still use the Tupperlight every now and then..

You can check out the video that I used it on below. 


MJ

IF YOU FOUND THIS HELPFUL OR HAVE ANY QUESTIONS THEN PLEASE DROP THEM IN THE COMMENTS BELOW. 

Monday, 14 April 2014

SEEING THE LIGHT : Our £100 Lighting Set Up

MJ Dixon is an Award Winning Filmmaker and Director of Low Budget worldwide releases including Slasher House and Legacy Of Thorn. He has also seen over 30 music videos and shorts appear on major TV channels around the world as well as running filming workshop The Micro Budget Massacre. He mostly spends his time leaping from life to life, striving to put right what once went wrong and hoping each time that his next leap, will be the leap home. 

READ FIRST!! Once again, please understand that this is just my outlook and opinion on aspects of filmmaking, Im not saying its right or wrong, it's just how I do things and how I view things, Filmmaking is about listening to everyone, your peers, professionals and everything in-between. This article is here to be nothing more than helpful to people looking to make movies, hopefully thats you. 

CAUTION : Obviously working with any electrics that create heat is dangerous, make sure any lights you get have the required protective glass and caging and of course just like tungsten lights be aware that, if not set up correctly, then it can, like anything on set, be very, very dangerous.

Lighting is the most important tool at your disposal when in comes to shooting anything. That sounds obvious, I know, but in advent of DSLRs and their ability to shoot in low light conditions, I slowly watched a lot of filmmakers around me slowly begin to ignore lightning all together as they struggled less and less to get a 'usuable' image, and slowly they stop reaching for the best image. 

Shooting in available light, is great. It's cheap, it's quick and it's easy and it's something I employ from time to time depending on the situation. That however simply doesn't always cut it, especially if you want to make dynamic looking films. Shooting in flat available light and colour grading after is brilliant for a quick fix, but really learning to light your films will a world of difference and will set your films apart from the standard colour graded footage that has become so popular in recent years. 

The trouble here, is that lighting equipment can set you back by thousands of pounds/dollars/euros to get a simple set up. The fact is though, it doesn't have to.  Our set up cost us, literally, just over £100 and I've never had to replace it.

Our £100 Lighting Set Up

I've shot for over 3 years now on a set up that cost me £100.75p (that 75p drove my OCD crazy). It's made up of three 500w work lamps and two 500w floor lamps. All these lights have lit everything I have made in the since 2011, including 2 feature film, half a dozen short films and over a dozen Music videos that have aired on major tv channels across the world. They run off a standard mains adapter and fit in a medium sized travel bag (although it is heavy) and it has never let me down. You can buy these things at most hardware shops and if you shop around I imagine you'll find an even better deal than we got. 


For barn doors, my set up becomes super, super low budget. It involves aluminium BBQ trays (6 for £1) and some pretty standard acetate for 50p an a3 sheet from the craft shop pinned to the trays with metal clips that come in packs of 20 from the £store. It's the most low-fi set up you will ever see in your life, but film is about the destination not the journey. For diffusing. I used greaseproof paper, and just cut it to size it cost about 50p a roll. I've bought one roll in 3 years. 

When I'm attaching BBQ trays to sheets of coloured plastic and hooking them on plastering lights, clients, crew, cast all look at me like I'm a mental case. However when they see the final product all that goes away when they see the result that I get. It's doesn't matter how you get your look as long as you get it (safely of course).


It may seem a little crude, but it gets the job done and I swear by in for any filmmakers that struggle to afford equipment. The only small drawback is that using acetate this close to heat source usually melts it out of shape after a day shoot. So I find that I buy new gels as needed per shoot, On average it usually costs me £1 to replace them. 

Lighting Set Up Cost Total = £104.25

The reason they work however is nothing to do with thier wattage, or brightness, or BBQ trays or how they plug in. No they work because I learned how to use them effectively and when you are shooting on something like an SLR, it's more important to understand how to light your scenes than ever, because it's the difference between a 'usable' pictures and something professional looking. 


On our latest feature Legacy Of Thorn, almost every scene was lit using this set up. 

I learnt to light properly on digital video and transfered those skills in the advent of DSLRs. it an important skill to learn and once you get it it will change the way you think about your films forever.  

I also understand that LED lights are becoming more common place, but currently a decent 'professional' set up is far from affordable off the shelf, although it doesn't have to be. I'll talk about that next time.

MJ

IF YOU FOUND THIS HELPFUL OR HAVE ANY QUESTIONS THEN PLEASE DROP THEM IN THE COMMENTS BELOW.